
Taking on a full-home remodel is one of the most significant projects a property owner can undertake. Transforming a living space requires balancing design choices, budget limits, structural engineering, and trade schedules across several months. While popular television shows condense whole-house renovations into neat thirty-minute episodes, the real-world process is a complex, multi-stage construction project.
Understanding how a full renovation unfolds week by week helps you set realistic expectations for noise, dusty conditions, material lead times, and financial milestones. Every home is unique, but professional renovations follow a predictable sequence. Skipping steps or rushing trade contractors out of order almost always leads to expensive rework, failed building inspections, and unnecessary frustration.
Knowing what happens at each stage of construction helps you make smart decisions, keep lines of communication open with your build team, and handle unexpected surprises with confidence. From initial site protection and structural framing down to mechanical rough-ins, custom finishes, and final punch lists, having a roadmap gives you control over the transformation. Here is a week-by-week guide to what a whole-house remodel actually looks like from initial site prep to the final walkthrough.
Understanding Whole-House Renovation Timelines

Taking on a full-home remodel is one of the most significant projects a property owner can undertake. Transforming a home requires balancing design choices, budget limits, structural engineering, and trade schedules across several months. While TV shows condense whole-house renovations into neat thirty-minute episodes, the real-world process is a complex, multi-stage construction project.
Understanding how a full renovation unfolds week by week helps you set realistic expectations for noise, dusty conditions, material lead times, and financial milestones. Every home is unique, but professional renovations follow a predictable sequence. Skiping steps or rushing trade contractors out of order almost always leads to expensive rework, failed building inspections, and unnecessary frustration.
Knowing what happens at each stage of construction helps you make smart decisions, keep lines of communication open with your build team, and handle unexpected surprises with confidence. Here is a week-by-week guide to what a whole-house remodel actually looks like from initial site prep to the final walkthrough.
Weeks 1–2: Pre-Construction Planning, Permitting, and Demolition Prep
The first two weeks set the foundation for the entire project. Before any walls are opened up, your team works behind the scenes to verify municipal permits, finalize architectural blueprints, and double-check material orders. Site setup is critical during this phase: plastic barrier dust walls, zipper doors, and floor protection panels are installed to shield any non-work zones or adjacent outdoor structures from debris.
Working with experienced remodeling contractors ensures that trade schedules line up smoothly and materials arrive on site when needed. Professional management prevents costly downtime where the house sits empty waiting for specialized components to be delivered.
Establishing clear project workflows early keeps your home construction timeline on track. Setting up weekly site meetings and using digital communication channels allows you to review progress, verify change orders, and address unforeseen framing or electrical issues right away.
-
Permit Verification: Securing approved building, electrical, mechanical, and plumbing permits from the city prior to starting physical labor.
-
Dumpster and Site Logistics: Positioning waste dumpsters, portable restrooms, and material storage containers to maintain a safe, organized job site.
-
Material Lead-Time Audit: Verifying that long-lead items, such as custom cabinetry, windows, and specialized plumbing valves, are ordered and tracked.
Weeks 3–5: Structural Demolition, Exterior Envelope, and Framing
With site protection installed and permits in hand, physical work begins. Demolition crews strip out old drywall, outdated fixtures, worn subfloors, and non-load-bearing walls down to the bare framing. If your renovation includes opening up floor plans, structural engineers and carpenters install heavy steel or laminated veneer lumber (LVL) beams to support upper floors.
Once internal tear-out is finished, attention shifts to securing the building envelope against rain and weather before interior work begins. Partnering with reputable roofing companies ensures that roof decking, flashing, drip edges, and shingles are repaired or replaced to protect new framing and subfloors.
Upgrading the building envelope also involves installing energy-efficient doors and windows. Scheduling timely window replacement allows carpenters to flash new window openings properly, sealing air leaks and creating a weather-tight shell before interior mechanical trades arrive.
-
Hazardous Material Safety: Identifying and safely removing old lead paint, asbestos floor tile, or pipe insulation following local environmental guidelines.
-
Subfloor Evaluation: Inspecting exposed floor joists for rot, insect damage, or sag, sistering new lumber where structural support is needed.
-
Interior Wall Layout: Framing new room partitions, closet layouts, and door openings according to approved architectural plans.
Weeks 6–9: Rough-In Mechanicals, Plumbing, and HVAC Distribution

Once the house is framed and weather-tight, the “rough-in” phase begins. During these crucial weeks, electricians, plumbers, and HVAC technicians run vital infrastructure behind walls, under subfloors, and through ceiling joists before drywall conceals everything.
A licensed residential plumber relocates supply and waste lines, installs PEX water lines, and sets heavy rough-in valve bodies for showers and tubs. Proper slope on main drain lines is double-checked to ensure reliable waste flow from all bathrooms and kitchens.
Concurrently, heating and cooling specialists design air distribution paths to guarantee balanced airflow throughout the newly configured layout. Working with qualified HVAC companies ensures supply trunks, return ducts, and vent boots are sized correctly for your home’s square footage.
-
Electrical Circuit Wiring: Running heavy-gauge copper wiring for high-draw appliances, dedicated panel breakers, outlets, light switches, and low-voltage network lines.
-
Gas Line Extension: Running fresh iron or flexible gas piping to fuel fireplaces, water heaters, kitchen ranges, and outdoor grilling stations.
-
Rough Building Inspections: Passing mandatory municipal inspections for framing, electrical, plumbing, and mechanical systems before closing up walls.
Weeks 10–13: Insulation, Drywall Hanging, Taping, and Priming
With all rough-in trade inspections passed, the house quickly transitions from an open wooden skeleton back into enclosed living spaces. First, insulation crews pack exterior wall cavities, knee walls, and crawlspaces with high-R-value fiberglass batts, mineral wool, or closed-cell spray foam to maximize energy efficiency and soundproofing.
Drywall hanging follows immediately. Skilled crews lift and screw heavy gypsum boards to wall studs and ceiling joists, utilizing water-resistant greenboard or cement board around wet areas like showers, tub surrounds, and kitchen sink zones.
Taping, mudding, and sanding require patience and craftsmanship. Tapers apply multiple thin coats of joint compound over mesh tape, sanding smooth between applications to achieve a seamless finish across the entire house.
-
Acoustic Soundproofing: Installing dense mineral wool insulation inside interior bathroom and bedroom walls to reduce noise transfer between rooms.
-
Drywall Finishing Levels: Achieving a smooth Level 4 or Level 5 drywall finish to eliminate visible seams under bright sunlight or direct overhead lighting.
-
High-Build Wall Primer: Spraying a dedicated drywall sealer/primer across all new surfaces to seal joint compound and ensure uniform paint absorption later on.
Weeks 14–17: Primary Flooring Installation and Cabinetry Set
As wall surfaces cure and dry, the house moves into the finish phase. Dust control becomes even more strict, as fine debris can spoil fresh flooring finishes or custom woodwork. The subfloor is thoroughly swept, scraped, and leveled to prepare for finished flooring materials.
Laying premium hardwood flooring across main living spaces brings warmth and character back to the home. Hardwood boards are brought into the house days early to acclimate to indoor humidity levels, preventing warping or gapping after installation.
Simultaneously, finish carpenters begin setting kitchen cabinets, pantry shelving, bathroom vanities, and built-in storage units. Cabinets must be set perfectly level and plumb using shims, creating a stable foundation for heavy stone countertops.
In sleeping areas and upper-level rooms, laying plush carpet over thick carpet pad adds foot comfort, insulates against room drafts, and dampens footsteps across second-story floors.
-
Subfloor Moisture Testing: Testing subfloor moisture content before laying wood or tile to prevent adhesive failure or cupping later on.
-
Cabinet Installation: Securing upper and lower cabinet boxes directly into wall studs using heavy-duty cabinet screws.
-
Interior Door Hanging: Fitting interior doors, double-checking jamb clearances, and installing temporary hardware for site access.
Weeks 18–20: Interior Trim, Surface Finishing, and Custom Painting
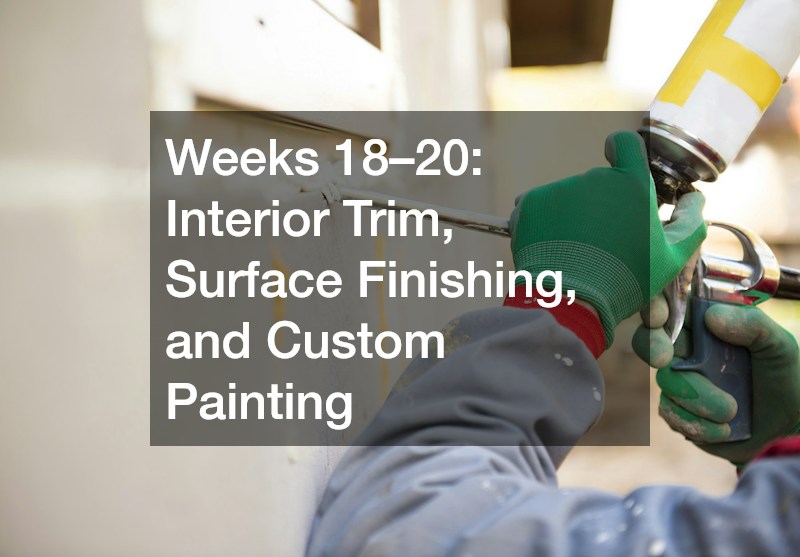
With major cabinets set and primary flooring laid, finish carpenters install decorative woodwork. Baseboards, crown molding, window casings, door trim, wainscoting, and stair railings are custom-fit, transformed from raw lumber into refined architectural details.
Surface prep is essential before any topcoat paint touches trim or walls. Painters fill nail holes with wood putty, caulk every joint between trim and drywall, and sand wood surfaces smooth to remove rough spots.
Hiring professional painting contractors ensures that trim receives smooth enamel topcoats and walls get even, uniform coverage without lap marks, drips, or overspray. Experienced painters know how to handle complex cut-ins around tall ceilings and detailed moldings efficiently.
Relying on skilled local painters brings regional knowledge to finish choices, ensuring low-VOC washable paints are applied in high-traffic hallways, kitchens, and bathrooms for long-term durability and easy cleaning.
-
Trim Caulking and Filling: Applying flexible, paintable acrylic caulk along all baseboards and door casings to block drafts and eliminate dark gaps.
-
Spray vs. Roll Application: Spraying interior doors and trim packages off-site or in controlled spray booths for a factory-smooth finish, then rolling walls with rich eggshell paints.
-
Accent Feature Execution: Painting custom accent walls, board-and-batten features, or dark ceilings to add depth and visual interest to primary living spaces.
Weeks 21–23: Countertops, Tile Backsplashes, and Fixture Trimming
During this stage, trade specialists handle high-detail finish installations. Countertop fabricators perform laser-accurate digital site templates over set cabinets, cutting solid quartz, granite, or marble slabs to fit snugly against finished walls.
Once stone tops are mounted, tile setters install backsplashes, shower walls, and bathroom floor accents. Every tile is laid carefully with waterproof membrane backings, leveled with plastic spacers, and finished with stain-resistant grout.
Plumbers, electricians, and HVAC technicians return for “fixture trim-out,” turning raw wire leads and stub-out pipes into fully functioning fixtures throughout the house.
-
Plumbing Fixture Trim: Connecting undermount sinks, designer faucets, showerheads, freestanding soaking tubs, and dual-flush toilets.
-
Electrical Fixture Trim: Mounting decorative pendant lights, chandeliers, recessed ceiling trims, wall switches, and tamper-resistant electrical outlets.
-
HVAC Register Set: Mounting clean supply registers, large return grilles, and installing smart learning thermostats for precise home climate control.
Weeks 24–26: Punch List, Deep Cleaning, and Final Walkthrough
The home remodel reaches the finish line in its final weeks. The physical construction is complete, and attention turns to fine details, thorough cleaning, and municipal sign-offs. Your project manager walks every room with you, building a detailed “punch list” of minor items that need touch-ups before final handover.
Fine drywall dust, sawdust, and construction residue settle everywhere during a major project. A specialized post-construction cleaning crew scrubs the home top to bottom, detailing glass windows, polishing stone countertops, vacuuming out air duct boots, and cleaning fresh floor surfaces.
-
Detailed Punch List Resolution: Using painter’s tape to mark minor paint scuffs, adjusting cabinet door hinges, and easing tight door latches.
-
HVAC System Cleaning: Replacing startup construction air filters with fresh high-efficiency filters and wiping down return grilles.
-
Final Municipal Sign-Off: Obtaining the final Certificate of Occupancy (CO) from city inspectors, confirming that all work meets local building safety codes.
Navigating the Transformation Journey

A full-home remodel requires patience, clear communication, and a realistic understanding of construction schedules. From tearing down old walls and running heavy mechanicals behind the scenes to setting custom cabinets, laying hardwood floors, and painting final accent walls, every phase plays a critical role in creating a safe, comfortable, and beautiful home. Skipping steps, cutting corners, or attempting to rush finish trades before rough infrastructure passes inspection only compromises structural integrity and increases long-term maintenance costs.
Understanding how each stage connects allows you to make informed decisions when unexpected site conditions arise, whether that means adjusting a material lead time, approving a minor structural modification, or fine-tuning your interior lighting layout. Approaching the project as a strategic partnership between you, your design team, and your trade contractors transforms a potentially overwhelming construction process into a rewarding creative journey.
Knowing what happens week by week helps you anticipate construction dust, handle trade workflows smoothly, and avoid stress when unexpected adjustments arise. With experienced professionals guiding the project, your patience pays off in a custom-designed, fully renovated home that serves your family well for decades to come, building immediate equity while elevating your daily living experience.